Installed in four easy steps
No digging, no specialist tools, no experience needed. Easy Edge is designed for anyone — from first-timers to professional landscapers.
See how easy it really is
Installed in minutes, looks great for years.
Installed in four easy steps
Follow along below. Each step includes a pro tip from our installation team.
Lay out your lengths
Unpack your Easy Edge and lay the 1m sections flat along your planned line. Each section is weighs around 2.5kg and are easy to reposition.
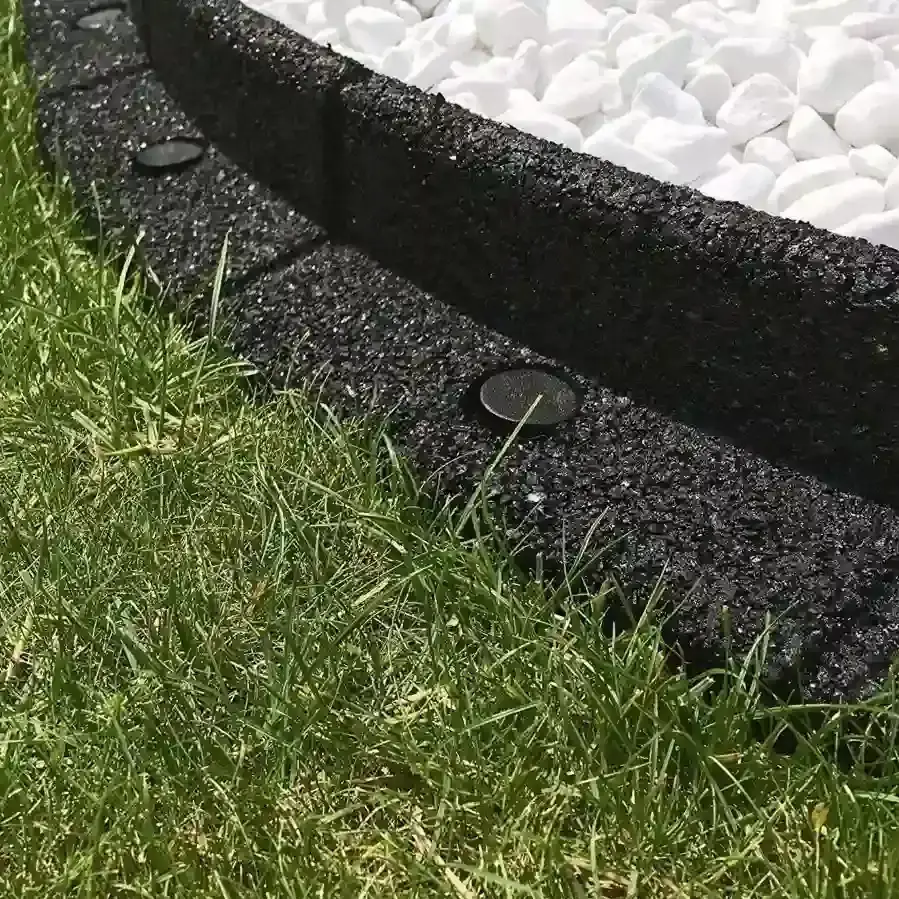
Connect with dowels
Using the provided dowels and pre-drilled holes, connect the lengths together. The dowels are designed to fit snugly — if they feel tight, apply a small amount of WD-40 to the dowel end to help it slide in smoothly.
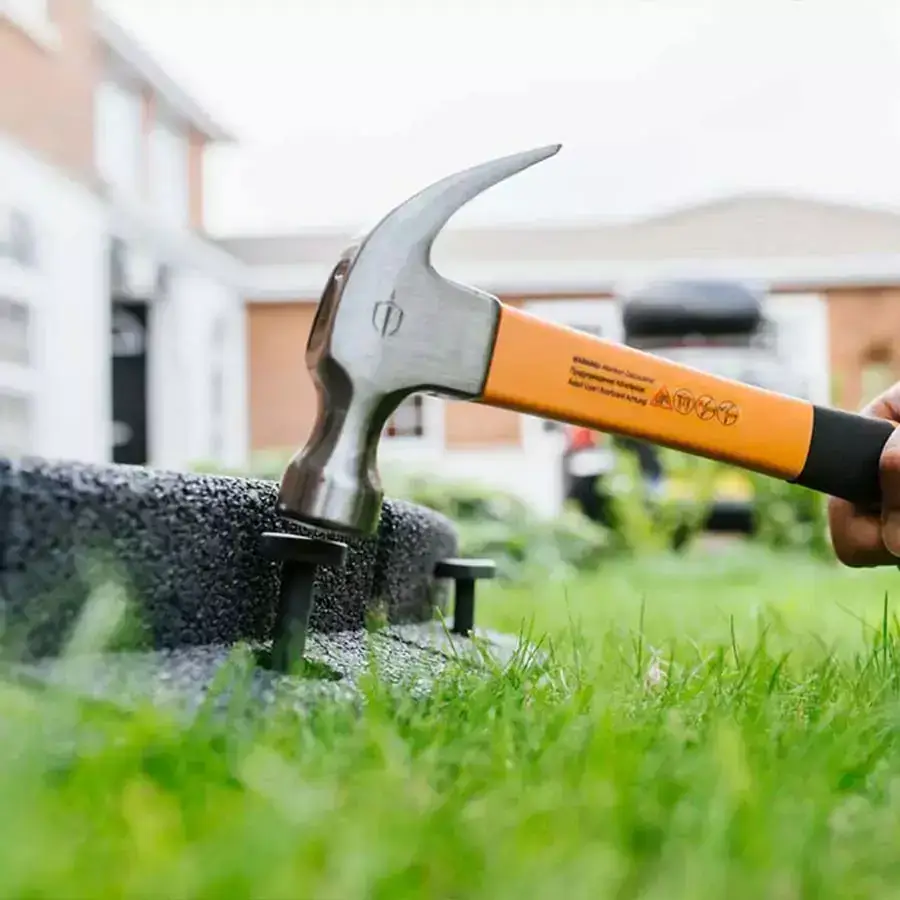
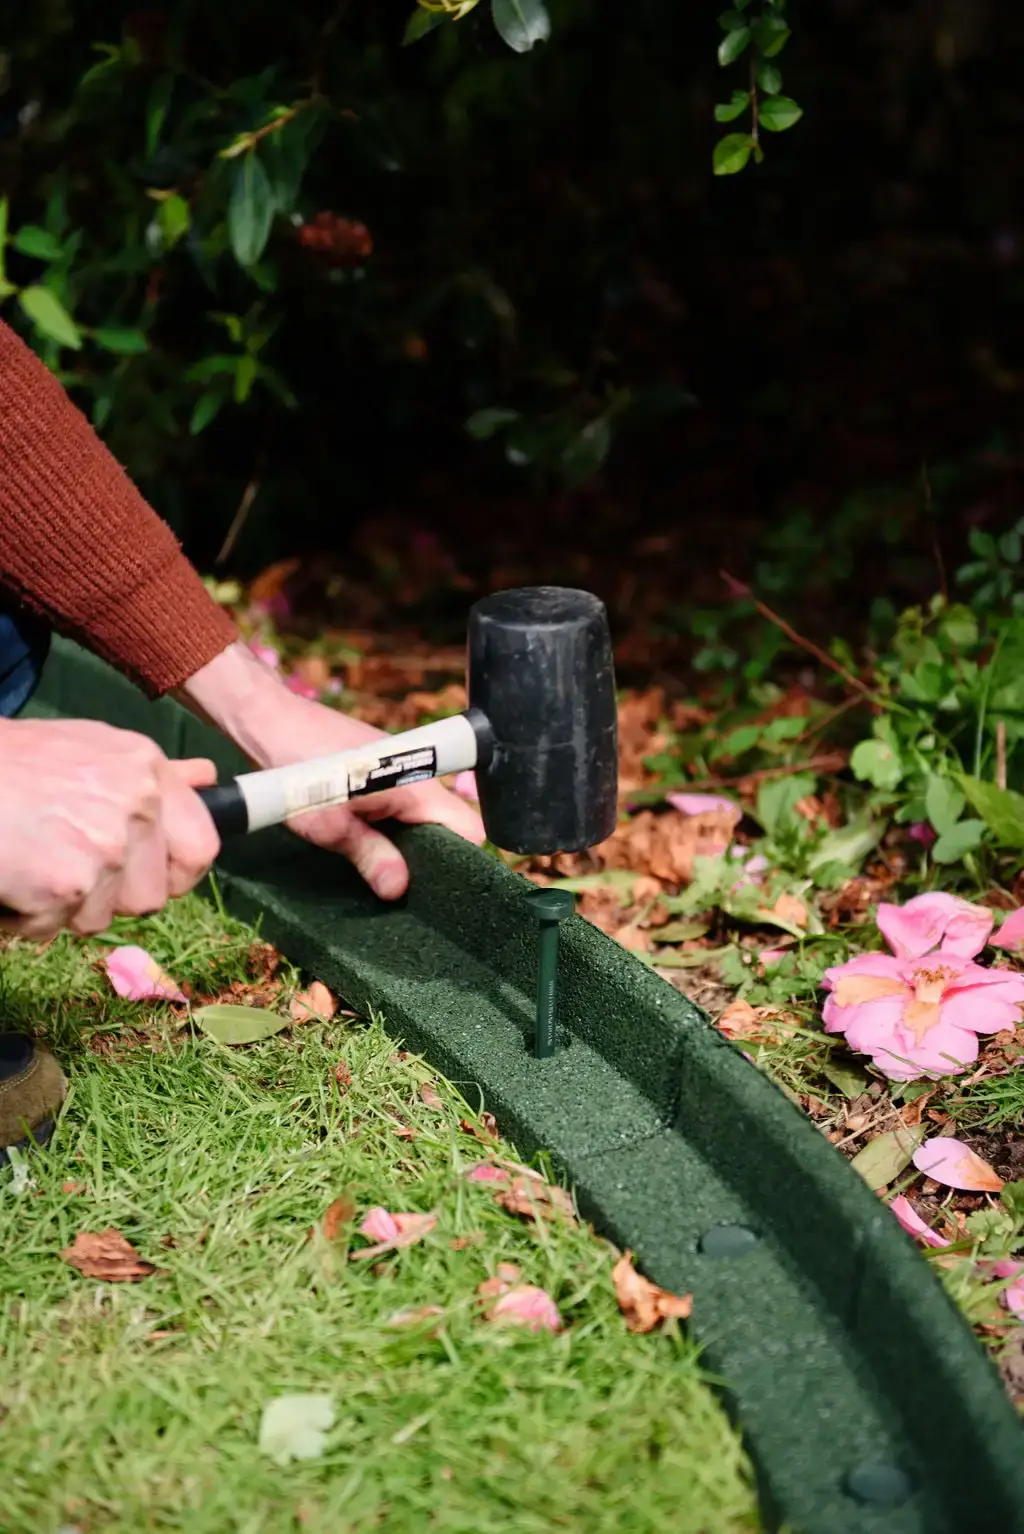
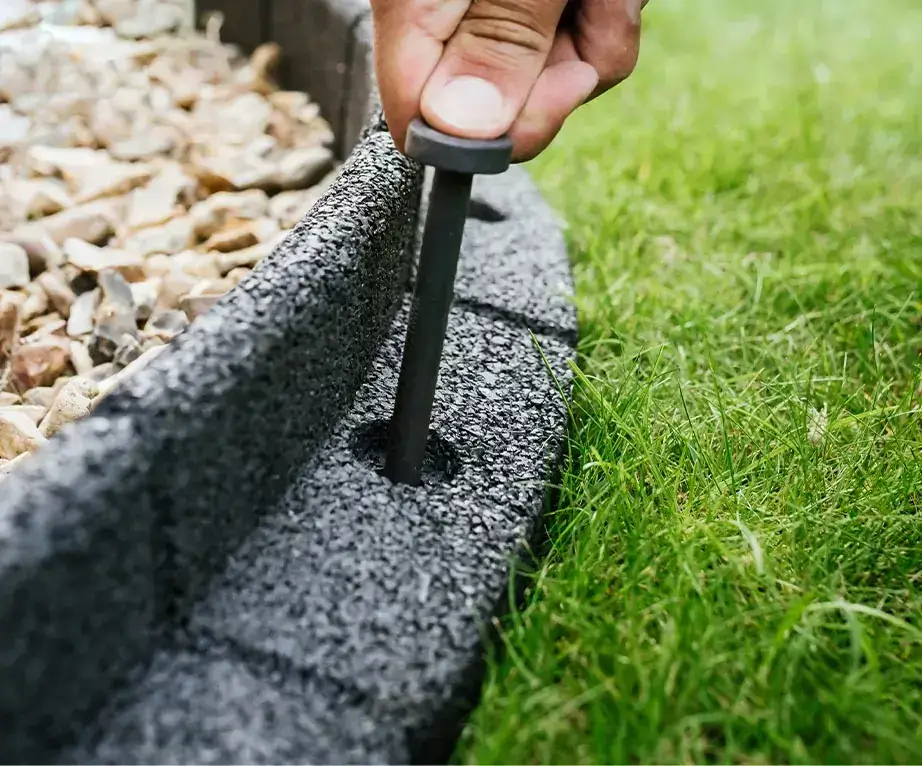
Peg into the ground
Use the included pegs to secure the Easy Edge in place. Press or tap them through the pre-drilled holes into the soil. On harder or rocky ground, use a rubber mallet to insert the pegs.
Done — enjoy the result
Once all sections are connected and pegged, step back and enjoy the result. Clean edges, professional finish, all in one afternoon. Need to trim a section to exact length? A standard handsaw cuts through cleanly in under a minute.
Creating circular borders
Easy Edge bends up to 70° per section, making smooth circles effortless. Use a stake and string to mark your radius before you start, then lay the edging along the line.
Connect the final section back to the first with a dowel and bond with Gorilla Glue for a seamless ring.
Tools & materials
Everything needed is included in your pack. These optional extras make the job even easier.
How much do you need?
Enter your measurements and we'll work out the right pack for you.
Pack calculator
Adds 3% automatically for cuts, corners, and waste
Helpful installation tips
From our installation team — answers to the trickier situations.
Get Easy Edge delivered to your door
Choose your colour, use the pack calculator to work out your quantities, and have it delivered anywhere in Australia.
"Installed in under an hour. The calculator made it so easy to order exactly the right amount."